Solak Boss Guide
December 12, 2023
Solak a group boss range from 2 to 7 players
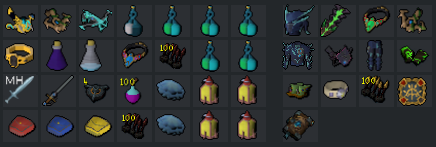
Learner Range Preset

Learner Mage Preset
(involves a ripper demon summon with scrolls)

Learner Guide
Mechanics
Solak Boss Mechanics Guide
Pads
- Timing: At 0:11, Solak will spawn.
- Description: One green pad for each player is generated at random locations around the arena.
- Objective: Players must quickly find and stand on their respective pads before the falling spore reaches the ground.
- Consequence of Missing Pads: If any pad is missed, all players will receive blight damage, ranging from 5,000 to 6,000 per missed pad.
- Strategy: Utilize movement-based abilities like Surge and Bladed Dive to rapidly reach your pad.
Post-Pad Mechanics
- Effect: Regardless of pad interception success, players receive an additional bar above their heads.
- Description: This bar represents a powerful, typeless blight bomb.
- Damage Potential: The bomb can deal damage between 8,000 to 10,000 upon the bar filling up.
- Mitigation Strategies: Use defensive abilities like Disruption Shield or Resonance to completely negate the bomb's damage.
- Note:
Proximity to Solak affects the timing of his auto-attacks, influencing when to activate Disruption Shield or Resonance for optimal effect.
Volatile Rootlings
- Timing: At 0:21 in the battle.
- Description: Solak summons 8 rootlings around the arena edges.
- Health: 20,000 HP each in duo, plus 12,500 HP for each additional player.
- Risk: If not defeated by 1:30, they become Blightbound Lashers, causing heavy damage and healing each other.
Personal Roots
- Timing: At 1:06 in the battle.
- Target: 2 random players.
- Alert: A text box with a timer and yellow arrows indicate root origin.
- Action: Move away from the pinpointed location to avoid massive damage.
- Note: If hit, use 'Freedom' to escape stun and move out of the root area.
Solak Boss Mechanics Guide
Pads
- Timing: At 0:11 Solak will spawn.
- Description: One green pad for each player is generated at random locations around the arena.
- Objective: Players must quickly find and stand on a pad before the falling spore reaches the ground.
- Consequence of Missing Pads: If any pad is missed, all players will receive blight damage, ranging from 5,000 to 6,000 per missed pad.
- Strategy: Utilize movement-based abilities like Surge and Bladed Dive to rapidly reach your pad.
Post-Pad Mechanics
- Effect: Regardless of pad interception success, players receive an additional bar above their heads.
- Description: This bar represents a powerful, typeless blight bomb.
- Damage Potential: The bomb can deal damage between 8,000 to 10,000 upon the bar filling up.
- Mitigation Strategies: Use defensive abilities like Disruption Shield or Resonance to completely negate the bomb's damage.
- Note: Proximity to Solak affects the timing of his auto-attacks, influencing when to activate Disruption Shield or Resonance for optimal effect.
Volatile Rootlings
- Timing: At 0:21 in the battle.
- Description: Solak summons 8 rootlings around the arena edges.
- Health: 20,000 HP each in duo, plus 12,500 HP for each additional player.
- Risk: If not defeated by 1:30, they become Blightbound Lashers, causing heavy damage and healing each other.
Personal Roots
- Timing: At 1:06 in the battle.
- Target: 2 random players.
- Alert: A text box with a timer and yellow arrows indicate root origin.
- Action: Move away from the pinpointed location to avoid massive damage.
- Note: If hit, use 'Freedom' to escape stun and move out of the root area.
Core
- Trigger: Post arms and legs defeat.
- Health: 125,000 HP per participant.
- Window: 18 seconds to damage before Solak repeats Phase 1.
- Transition: Upon core defeat, Phase 1 ends and Phase 2 begins.
Eruptions
- Phase 2 Start: Eruptions spawn in each arena corner.
- Action: Destroying an eruption creates a teleport circle to the Anima Storm.
- Timing: Teleport occurs 5 seconds post-eruption defeat.
Cleanse/Blight Stacks
- Phases: Applicable in Phases 2 and 3.
- Mechanic: Merethiel activates a circle to remove Blight Stacks.
- Effect: Each stack reduces damage by 1,000 and increases received damage by 1%.
Blight Spores
- Trigger: Post-eruption defeat.
- Pattern: Spores rise, fall, and explode, increasing in damage over time.
- Danger: Late-stage spores can deal up to 8,000 damage.
Anima Rain
- Timing: 12 auto attacks post-Blight Spores.
- Pattern: 5 sky strikes, each potentially dealing 8,000 damage.
- Protection: Use Blessing of Nature shield to reduce damage by 75%.
Arm Climb
- Timing: 2 auto attacks post-Anima Rain.
- Target: Random player pull and root.
- Action: Use 'Anticipate' or 'Freedom' to avoid insta-kill.
- Post-Attack: Click Solak’s arm to climb and counterattack.
P3 Pad
- Phase 3 Start: 8 pads spawn around the arena.
- Mechanic: Charged pads (15 seconds) signal Solak's attack pause.
- Action: Use Extra Action Button during the 12-second window to enter the Realm.
Realm
- Access: Via Extra Action Button in Phases 3 and 4.
- Limitation: Food doesn't heal in the Realm.
- Phase 3 Objective: Defeat Erethdor.
- Phase 4 Objective: Tank manifestations to extend damage window.
Phases Quick Guide
Phase 1
- Goal: Bring Solak to HP cap, defeat the core.
- Actions: Damage Solak, handle pads, rootlings, and personal roots, then focus on the core.
Phase 2
- Goal: Eliminate Eruptions and Anima Storm, then drain Solak's corruption bar.
- Actions: Kill eruptions, cleanse, damage Anima Storm, avoid Blight Spores and Anima Rain, then complete the Arm Climb.
Phase 3
- Goal: Damage Solak to HP cap, then defeat Erethdor.
- Actions: Use ultimate abilities, damage Solak, enter Realm to defeat Erethdor, watch for Blight Bombs and stuns.
Phase 4
- Goal: Reduce Solak to 0 HP before manifestations end him.
- Actions: Damage Solak post-animation, use powerful abilities, stun if necessary, and complete the kill or face a wipe.


